 3D Printer FYI
Start with three things you want to make. Save their models, write down where they will be used, and identify the largest part that genuinely needs to be printed in one piece. That is a better purchasing specification than “fast, reliable, reasonably priced,” which describes approximately every printer advertisement ever written.
This guide gives you a decision process. The printer catalog supplies dated records; the selector keeps unresolved requirements visible. If you already know the envelope is small, start with the three-machine beginner shortlist and the entity pages for the Bambu Lab A1, ELEGOO Neptune 4 Pro, and ELEGOO Mars 5.
Write requirements before preferences
Make two lists. Requirements determine whether a machine can do the job. Preferences determine which eligible machine you would rather own.
| Requirement | What to record | Where to check |
|---|---|---|
| Part envelope | X, Y and Z in the intended orientation, including planned extra space | Build geometry and operating configuration |
| Material | Exact formulation where known; intended service environment | Material guidance, manufacturer documentation and hardware limits |
| Workflow | Local operation, available space, support and maintenance access | Current manuals and software documentation |
| Budget | Machine, necessary accessories and the cost of getting started | Dated offers for the right market and variant |
A missing field is an unanswered purchasing question. It does not mean the feature is absent, and it cannot satisfy a hard requirement.
Build volume is geometry
A 200 × 200 mm rectangle needs a diagonal of about 283 mm to fit inside a circular bed without rotation changing that diagonal. It will not fit inside a 250 mm circle simply because both side lengths are smaller than 250 mm. This is geometry, not a printer benchmark.
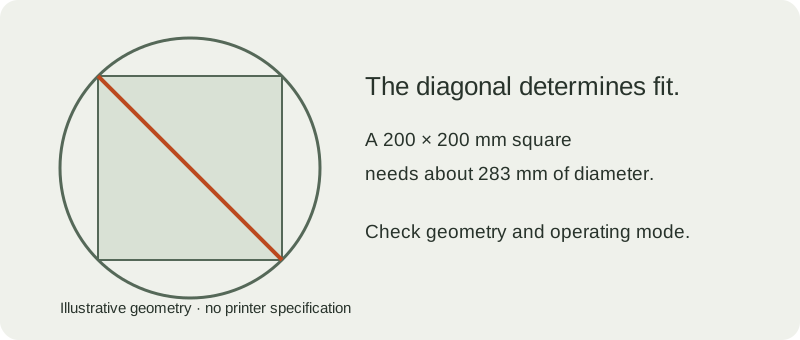
Check the intended operating mode too. A dual-tool configuration can have a different usable envelope from a single-tool configuration. Keep those configurations separate. Leave room for the brim or other structures your sliced job actually requires; the model’s bounding box is only the starting point.
Prusa’s design guidance also emphasizes orientation and the absence of a universal fit allowance. Printed geometry depends on the process. A catalog envelope cannot promise a successful fit between your finished parts. Design guidance
Choose the material, then check the machine
Use the material selector to examine documented guidance and the compatibility checker to inspect hardware requirements. Prusa’s material guide separates nozzle and bed settings, enclosure guidance and build-sheet applicability. Those are different constraints; a hot nozzle alone does not answer all of them. Material guide
A manufacturer’s material-support statement and a computed hardware check should remain visible separately. A passed temperature check does not establish an entire printing process, and a broad family name does not establish the properties of every filled or modified formulation.
Work through two examples
Example A: household organizers. Suppose your chosen orientation needs 180 × 120 × 100 mm, your material is still undecided, and your machine budget is $600. Open those dimensions and budget in the selector. These are illustrative requirements, not a recommendation to spend $600. Inspect the unresolved group: a missing current US price cannot prove a printer meets the budget.
Example B: a functional housing. Suppose one shell needs 280 × 180 × 120 mm. Start with that envelope, then document service temperature, mating parts and material requirements. If the shortlist is poor, evaluate splitting the housing and designing the joint before buying a larger machine. The fit workbench helps record the resulting coupon tests.
Compare ownership, not just the headline
For each finalist, find a nozzle replacement procedure, a build-sheet replacement and the relevant spare parts. Read how files reach the printer and what works without an online account. Record those answers with links and dates; do not infer them from a brand’s reputation.
Treat advertised speed and independent throughput as different evidence. Compare like jobs and settings when measurements exist. If they do not, leave the performance comparison open. Adjusting a ranking weight cannot create a missing benchmark.
Use the cost calculator to explore your own material, labor and machine-cost assumptions. Measured electricity is optional, but its omission remains explicit. Keep shipping, taxes, required accessories and the selected offer variant on your purchase worksheet.
The decision to keep
Save your selector link and compare two to four finalists. Write a one-sentence reason for the choice, the unresolved questions you accepted, and the requirement that ruled out each alternative. That record will be more useful when the next machine launches than a screenshot of a ranking.
Next: establish a calibration baseline before deciding your new printer needs upgrades.
Sources
- Designing for printing — Prusa — reviewed 2026-09-15.
- Filament Material Guide — Prusa — reviewed 2026-09-15.