 3D Printer FYI
A printer upgrade should change an outcome you care about. If the outcome is “I enjoyed rebuilding the toolhead,” that is legitimate. It just belongs in a different column from faster production or improved accuracy.
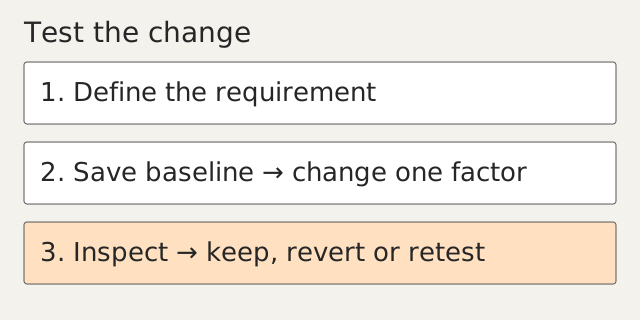
Write down the current limit and a test before selecting parts. Keep the working configuration recoverable. The best upgrade plan includes a way back.
Match the complaint to a candidate
| Observed limitation | Investigate first | Candidate only if justified |
|---|---|---|
| Large parts take too long | Sliced feature times and flow limits | Different nozzle or higher-flow system |
| Fine details disappear | Model geometry, line width and preview | Smaller supported nozzle |
| Repeated ringing | Mechanical condition and motion settings | Supported resonance tuning or structural change |
| Abrasive formulation required | Exact material and nozzle guidance | Wear-resistant compatible nozzle |
| Warping with a chosen formulation | Process/environment requirements | Manufacturer-compatible enclosure |
| Frequent downtime | Recorded failure and parts availability | Targeted serviceability improvement |
These are investigation paths, not automatic recommendations. A missing requirement should stay unresolved until the source or measurement supports it.
Know which limit is active
PrusaSlicer’s maximum volumetric-speed setting constrains extrusion based on the profile and cross-sectional model. A larger nozzle may still be flow-limited; a faster commanded motion may still be limited by cooling or the short geometry of the part. Inspect the sliced job before buying a hotend around a headline speed. Max volumetric speed
Nozzle diameter also changes the geometry the printer can represent and which materials are appropriate. Prusa’s Nextruder table specifies restrictions for small nozzles and abrasive formulations. Treat those as configuration-specific guidance, not a list of universal compatible thread sizes. Prusa Nozzle types for Nextruder printers
Use nozzle/hotend compatibility and replacement parts to inspect the candidate, then confirm its official installation and profile requirements.
Make a compatibility card
Record mechanical mounting, nozzle position, sensor and heater requirements, electrical ratings, cooling arrangement, firmware support, usable build area and required profile changes. A connector fitting is not evidence that its wiring or load is correct.
For an enclosure, verify the manufacturer’s limits for the complete printer and electronics. Containing warm air and controlling emissions are different engineering tasks. See enclosure promises for the assembly and access questions a box must answer.
Avoid modifying heater, electrical or firmware safety limits without the relevant manufacturer-approved procedure and competent review. An upgrade that works only after its warnings are disabled has not passed qualification.
Worked example: evaluate a larger nozzle
This is a proposed comparison, not a speed benchmark.
- Choose a representative part with its real minimum features and strength requirements.
- Save the current project, profile and accepted sample.
- Slice for the candidate supported nozzle using its matching profile. Inspect thin walls, holes, supports and estimated time.
- Reject the change early if the required geometry no longer appears correctly in the preview.
- If installation is justified, follow the official change procedure and run its required setup checks.
- Print the representative job. Record actual elapsed time, material consumed, fit checks and any rejected features.
- Compare cost per accepted part, including the time spent changing and qualifying the machine. A faster failed part is still a failed part.
Use printer comparison for documented catalog configurations. Keep your own modified setup and its measurements in a separate local record; do not attribute its result to an unmodified base model.
Retune only what the modification changes
Klipper documents moving-mass and stiffness changes as reasons to revisit resonance measurements. Its pressure-advance procedure addresses a separate extrusion behavior. Do not copy the old values or another machine’s values as though they describe the new assembly. Resonance Compensation Pressure advance
Finish with the same acceptance check used for the baseline. If the modification improves one metric but harms another, state the tradeoff. Retain the stock parts and configuration while deciding whether it earns a permanent place.
If the requirement demands several expensive changes, compare that project with a different machine or outsourcing. Building a better printer can be the point. Buying six upgrades to avoid admitting you need a different process is a less satisfying hobby.
Sources
- Max volumetric speed — Prusa Research. Reviewed 15 September 2026.
- Prusa Nozzle types for Nextruder printers — Prusa Research. Reviewed 15 September 2026.
- Resonance Compensation — Klipper maintainers. Reviewed 15 September 2026.
- Pressure advance — Klipper maintainers. Reviewed 15 September 2026.